Max Glenister
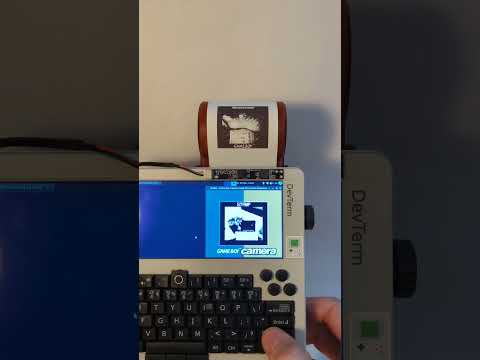
I turned my DevTerm into a Game Boy Camera and Printer
The Game Boy Camera was brilliant and stupid in equal measure, a 128x112 pixel sensor bolted on top of a cartridge, printing to thermal paper on a Game Boy Printer the size of a brick. I got both for Christmas when I was 12 and somehow spent hours with them. The minigames are absurd, the image quality is aggressively awful, and the whole thing looks like a prop from a cheap sci-fi film. I loved it.


I’ve had a DevTerm A04 since launch, modded it a bit, and mostly use it as a curiosity. It’s a small ARM-powered Linux machine in a retro terminal form factor with a built-in 58mm thermal printer. At some point it occurred to me that I could use it to emulate the whole Game Boy Camera setup, mGBA running the GB Camera ROM, a USB webcam feeding in as the camera sensor, and the DevTerm’s printer standing in for the Game Boy Printer. Tiny thermal photos. Same aesthetic, one device.
The idea on paper was simple enough. When a print is triggered in-game, mGBA saves the output as a PNG. A Python script watches for new files and converts them to 1-bit monochrome to send to the printer. Four moving parts. Should be fine.
It was not fine. Not immediately, anyway.
The OS was showing its age

My DevTerm was still running the original OS image it shipped with, Ubuntu 21.04 Hirsute. That version hit end-of-life in January 2022, so the package repos were long dead. Anything involving apt install was either broken or unreachable. The printer service also wasn’t working, which I couldn’t easily diagnose without being able to install anything.
ClockworkPi provide an updated image, DevTerm_A04_v0.2h.img.bz2, based on Ubuntu 22.04 LTS (Jammy) with Linux 5.10.75. Flashed via macOS:
bunzip2 -c DevTerm_A04_v0.2h.img.bz2 | sudo dd of=/dev/rdiskX bs=4m
It booted fine and the package repos worked. The printer still didn’t work, but at least now I could start diagnosing it.
How the printer works
The DevTerm’s printer doesn’t expose itself as a simple device node. Instead there’s a pair of services: devterm-socat.service creates a named pipe at /tmp/DEVTERM_PRINTER_IN, and devterm-printer.service reads from it and drives the hardware over SPI. To print something, you write ESC/POS commands to the pipe.
On the fresh image both services came up without issue, which was more than could be said for the old Hirsute install.
It was the ribbon cable
I tried sending a test command (\x12\x54 is DC2 T, the ESC/POS self-test sequence):
echo -ne "\x12\x54" > /tmp/DEVTERM_PRINTER_IN
The printer display showed “Error: NO PAPER”. The paper was loaded. I pulled the holder out and reinserted it. Still “NO PAPER”.
I ran strace on the printer process to check whether anything was actually happening:
sudo strace -p $(pgrep devterm_thermal) 2>&1 > /tmp/strace.log &
echo -ne "\x12\x54" > /tmp/DEVTERM_PRINTER_IN
The log showed ioctl calls against file descriptor 4. Checking /proc/$(pgrep devterm_thermal)/fd confirmed FD 4 is /dev/spidev0.0:
0 -> /dev/null
1 -> /tmp/devterm_printer.log
2 -> /tmp/devterm_printer.err.log
3 -> /dev/mem
4 -> /dev/spidev0.0
5 -> /dev/pts/0
SPI commands were going out and the daemon was doing its job. The printer hardware just wasn’t responding.
The ribbon cable (FPC) connecting the printer board to the mainboard was loose, not visibly out but not seated properly at both ends. The spec sheet notes the FPC connector should only be plugged and unplugged fewer than ten times in its entire life, which is a slightly alarming thing to read while reseating a connector for the second time. Reseated it anyway, sent the self-test command again:
echo -ne "\x12\x54" > /tmp/DEVTERM_PRINTER_IN
It printed. Logo, fonts, QR code, system info, the lot.

Hardware sorted. Time to actually do the thing.
The camera
The camera I’m using is an HBV-1313, a £7.82 USB module that’s 60mm long and 8mm wide. I didn’t want to be lugging a full webcam around or cable-tying something to the shell, and this sits neatly above the screen held on with double-sided tape, which is exactly the kind of mounting solution the GB Camera aesthetic deserves.

The module shows up as /dev/video1. I grabbed a shot with fswebcam:
fswebcam -d /dev/video1 test.jpg
Converting and sending it to the printer took a small Python snippet:
python3 -c "
from PIL import Image, ImageOps
import struct

img = Image.open('test.jpg').convert('L')
w, h = img.size
new_h = int(h * (384 / w))
img = img.resize((384, new_h), Image.NEAREST)
img = ImageOps.invert(img).convert('1')
data = img.tobytes()
header = b'\x1d\x76\x30\x00' + struct.pack('<HH', 48, new_h)
open('/tmp/DEVTERM_PRINTER_IN', 'wb').write(header + data)
"
The shot was taken blind over SSH, which explains the composition. The print has a gap in the middle where I forgot -e on the echo command and printed a literal \n\n\n\n\n. Pipeline confirmed working.


mGBA and the file watcher
With the camera already working, I launched mgba-qt with the GB Camera ROM. mGBA has a camera sensor backend that maps a V4L2 device to the cartridge’s sensor interface, so it picked up /dev/video0 without any extra configuration.

mGBA does have GB Printer emulation built in. You open it via Emulation, Game Boy Printer, and get a dialog with a live print buffer, a “hurry up” button to skip the timing delay, “tear off” to flush the buffer (useful for batching multiple prints into one image), zoom, copy, and save. It’s a perfectly good tool, but saving still means clicking through a dialog each time. My first attempt at automating around this was a file watcher: save the PNG wherever you like, and the script picks it up and sends it to the printer.
The script watches a directory for new PNG files and sends each one to the printer. The conversion is the awkward bit: GB Camera output is 160px wide, 4-shade greyscale; the DevTerm printer wants 384 dots per row, 1-bit monochrome. Image.NEAREST for the resize matters here. Bilinear would blur the pixels into mush; nearest-neighbour keeps the chunky look intact.
import sys
import time
import struct
from pathlib import Path
from watchdog.observers import Observer
from watchdog.events import FileSystemEventHandler
from PIL import Image, ImageOps

PRINTER_IN = '/tmp/DEVTERM_PRINTER_IN'
PRINTER_WIDTH = 384

def send_image(path):
    img = Image.open(path).convert('L')
    w, h = img.size
    new_h = int(h * (PRINTER_WIDTH / w))
    img = img.resize((PRINTER_WIDTH, new_h), Image.NEAREST)
    img = ImageOps.invert(img).convert('1')
    data = img.tobytes()

    width_bytes = PRINTER_WIDTH // 8
    header = b'\x1d\x76\x30\x00' + struct.pack('<HH', width_bytes, new_h)

    with open(PRINTER_IN, 'wb') as f:
        f.write(header + data)

class PrintHandler(FileSystemEventHandler):
    def on_created(self, event):
        if event.src_path.endswith('.png'):
            time.sleep(0.1)  # let mGBA finish writing
            send_image(event.src_path)

if __name__ == '__main__':
    watch_dir = sys.argv[1] if len(sys.argv) > 1 else '.'
    observer = Observer()
    observer.schedule(PrintHandler(), watch_dir, recursive=False)
    observer.start()
    print(f'Watching {watch_dir}')
    try:
        while True:
            time.sleep(1)
    except KeyboardInterrupt:
        observer.stop()
    observer.join()
Skipping the middleman
The script worked, but the workflow was still a mess. To actually print something you’d take a photo in-game, trigger a print, open the Game Boy Printer dialog, wait for the buffer to fill, click save, choose a filename, save it to wherever the watcher was looking, and then it would send it to the printer. The whole point of the GB Printer was that print was one button. This was six.
So I forked mGBA and wired its printer emulation directly to the thermal pipe. mGBA was already capturing the printer buffer and emitting a signal when a print job came in, so the fork just catches that signal and sends the image to the pipe instead of opening a save dialog. Nothing changes in the emulator’s GB Printer handling. The image gets scaled, contrast-adjusted, dithered to 1-bit monochrome, and written as an ESC/POS bitmap command, all in one step. The printer auto-attaches when any GB game loads, so the game always sees it as connected. That includes Photo!, a homebrew alternative to the GB Camera ROM with considerably more control over the imaging side, if the original isn’t enough.

There’s a settings panel under Tools, Thermal Printer Settings:
- Auto-print: whether to actually send anything to the printer (the printer is always attached regardless)
- Pipe path: defaults to
/tmp/DEVTERM_PRINTER_IN - Density: 0–15, how hard the print head fires
- Contrast: 1.0–4.0, applied before dithering
- Dithering: threshold, ordered/Bayer, Floyd-Steinberg, or Stucki
- Scale: integer 2x centred, or stretch to full width
- Feed lines: paper advance after printing
- Instant print return: skip the print timing delay
The defaults are all DevTerm-specific, but it should work with any ESC/POS thermal printer with the pipe path changed.
The fork is at omgmog/mgba on the devterm-thermal-printer branch, with a pre-built binary for the DevTerm A04 (aarch64, Ubuntu 22.04 Jammy) for anyone who doesn’t want to build it.
Dithering
Converting from the GB Camera’s 4-shade greyscale to 1-bit monochrome is where most of the image quality lives or dies. A thermal printer can either fire a dot or not (there’s no such thing as grey), so dithering is the only way to fake tonal range. The patch offers four options, and they produce noticeably different results.

Original

Original 2x

Threshold

Ordered (Bayer)

Floyd-Steinberg

Stucki
Threshold is harsh. Everything becomes either white or black, the midtones disappear, and the result looks like a photocopy left in the sun. Ordered/Bayer gives a classic halftone look, regular dot patterns standing in for greys, which is fine but reads as “printed” in a fairly obvious way. Floyd-Steinberg is where it starts to feel more photographic, the grain distributed unevenly in a way that looks almost natural. Stucki does the same thing with a bit more finesse, the dots finer, the transitions smoother. On thermal paper, where there’s no such thing as grey anyway, Stucki consistently gets the most out of the image.
So anyway, that’s a print
The thermal prints will fade in a few years and they’re too small to frame. Nobody asked for this. But it’s the same stupid aesthetic from Christmas 1998, running on hardware I had to reflash and debug and physically reseat a ribbon cable on, printing photos through an emulator I had to fork. There’s something satisfying about that chain of effort for something this pointless. If you had a GB Camera as a kid, you already understand. If you didn’t, I’m not sure I can explain it.